How to Upgrade a Manual Ditch Paver to Automatic?

Time:2026-09-10 Author:Charlotte
0%

Upgrading a manual ditch paver can improve consistency, reduce operator fatigue, and support safer daily production. However, automation is not simply a matter of adding a motor. The machine’s frame, mold, power system, and control logic must work together. This guide explains how to upgrade a manual ditch paver to automatic operation through practical engineering decisions and controlled testing.

Begin by inspecting the existing paver in real working conditions. Check the frame for cracks, measure mold dimensions, and record the force needed to move concrete through the channel. A hydraulic cylinder may replace manual pushing, while an electric motor can drive the wheels or vibration system. Install limit switches, emergency stops, guarded moving parts, and a clearly labeled control panel. These details matter near wet concrete and uneven ground. They are easy to overlook.

The upgrade should match the ditch profile, concrete mix, travel speed, and available power supply. Use a variable-speed controller when site conditions change. Test the machine slowly before increasing production. Watch for mold blockage, uneven concrete edges, hydraulic leaks, and wheel slippage. Keep written test records, including pressure, speed, vibration frequency, and finished dimensions. Experienced technicians should verify electrical and hydraulic connections before operation. Local machinery, electrical, and workplace safety requirements must also be reviewed.

Automation can expose weaknesses that manual work once concealed. That is an important lesson. A reliable conversion is measured by stable results, simple maintenance, and safe emergency control—not by speed alone. With careful planning, the upgraded paver can produce cleaner channels while reducing unnecessary physical effort.
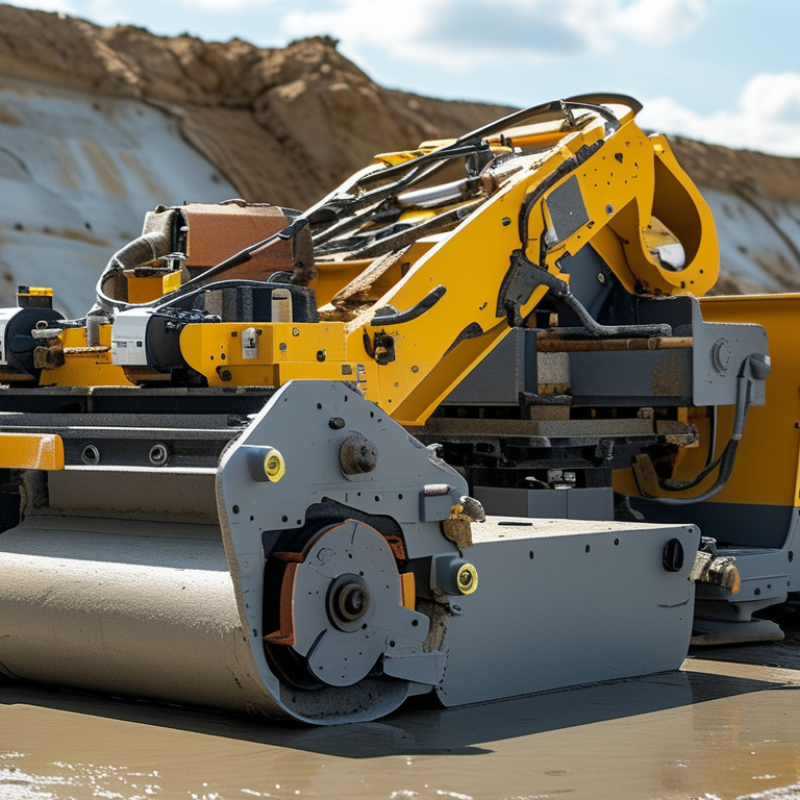
How to Upgrade a Manual Ditch Paver to Automatic?

Assess the Current Manual Ditch Paver and Define Automation Goals

Before upgrading a manual ditch paver, inspect how it actually works in the field. Record paving width, ditch depth, travel speed, concrete flow, and adjustment frequency. Watch the operator during a full shift, not only during a clean demonstration. Mud, uneven ground, and changing mix consistency often reveal hidden problems.

Check the machine’s frame, mold, vibration system, hydraulic circuits, and steering response. Measure wear around the mold edges and examine areas where material builds up. Interview operators about delays, hand fatigue, and difficult corrections. Their practical experience can expose issues that sensors may not detect. Our early checklist was incomplete. We ignored short interruptions, yet they caused significant production losses.

Automation goals should be specific and measurable. A suitable target may be maintaining paving speed within a narrow range, controlling concrete delivery automatically, or keeping the mold aligned with the ditch centerline. Define acceptable tolerances before choosing sensors or controllers. Safety must remain central, especially near moving components and wet concrete. Manual override, emergency stopping, and clear warning signals are essential requirements.

Avoid automating every function immediately. A staged plan may begin with speed monitoring and guided steering, then add material-flow control. Test each function on a controlled section and compare results with manual operation. Record defects, downtime, surface quality, and operator workload. Some targets may need revision after testing. That is not failure. It is useful evidence.

Select the Control System, Sensors, and Powered Components

Upgrading a manual ditch paver begins with the control system, not the motor. Choose a rugged programmable controller with sealed connectors, clear diagnostics, and inputs for speed, position, and emergency stops. The controller should support manual override during setup and a controlled stop when a sensor fails. Keep the wiring diagram inside the service panel. Test it twice. An enclosure rated for dust, water, and vibration is essential near wet aggregate.

Sensor selection depends on the paver’s movement and the ditch profile. An encoder can measure conveyor or wheel speed, while a linear sensor can track screed height. Add proximity sensors at travel limits and a level sensor near the material hopper. Use redundant feedback where unexpected movement could damage the ditch lining. During testing, compare sensor readings with a tape measure and slow-motion video. Do not trust one perfect reading. Moisture, mud, and loose cables create false signals after several hours of work.

Powered components must match the machine’s load and operating environment. Select a geared drive, hydraulic actuator, or electric cylinder after measuring force, travel speed, and duty cycle. Provide overload protection and accessible isolation points. A variable-speed drive can improve material flow, but excessive speed may cause uneven placement. Record motor temperature, current draw, and paving consistency across several passes. One early test may look successful, yet the machine can drift when the ditch becomes deeper. Leave room for adjustment. A qualified technician should verify the final controls before regular operation.

How to Upgrade a Manual Ditch Paver to Automatic?

Select the control system, sensors, and powered components according to their typical update rates in an automatic ditch-paving control loop.

Representative engineering values: fast feedback devices such as IMUs and proportional valves require higher update rates, while GNSS and ultrasonic sensors generally operate at lower rates. The final settings should be verified against machine speed, hydraulic response, and site conditions.

Modify the Paving, Conveying, and Material-Delivery Mechanisms

Upgrading a manual ditch paver requires more than adding a motor. The paving, conveying, and material-delivery mechanisms must work as one controlled system. Begin with the paving assembly. Install an adjustable hydraulic or electric actuator to control screed height and paving width. A position sensor can monitor movement and reduce uneven edges. However, sensors may lose accuracy when covered with wet soil or dust. Regular cleaning remains essential.

The conveying mechanism should deliver material at a steady rate. A variable-speed drive can match conveyor output with travel speed. This prevents empty sections, piling, and unnecessary material waste. Add a guarded chain or belt system with accessible inspection points. The delivery mechanism also needs a responsive gate or auger. It should open gradually, not release the entire load at once. During field testing, operators should compare material depth every few meters. Small differences often reveal calibration problems before they become expensive repairs.

Tips: Use manual override controls during testing. Mark the ideal gate position. Keep wiring sealed and clearly labeled. Test emergency stops before daily operation. Do not depend entirely on automation; changing soil moisture, aggregate size, and ditch shape can confuse fixed settings. A practical upgrade leaves room for operator judgment. Some early settings may be wrong. Record them, review the results, and adjust the system carefully.

Install and Integrate the Automatic Operating System

How to Upgrade a Manual Ditch Paver to Automatic?

Installing an automatic operating system starts with mapping every manual action. Record steering input, paving speed, material flow, vibration, and emergency stops. A programmable controller can coordinate these functions through sensors, hydraulic actuators, and a clear operator panel. Keep manual override available. It remains essential during testing and unusual ground conditions.
The system should use position sensors, incline detection, and flow monitoring to adjust paving in real time. A closed-loop speed controller can reduce uneven output, especially when soil resistance changes.
The International Federation of Robotics reported 541,302 industrial robots were installed worldwide in 2023, showing how feedback-based automation is becoming standard across production. Construction equipment needs the same discipline, but harsher dust, vibration, and moisture demand stronger protection.

Safety must be engineered before convenience. Use guarded moving parts, dual-channel emergency stops, fault alarms, and controlled restart logic. ISO 13849-1 provides a practical framework for safety-related control systems, while IEC 60204-1 addresses electrical equipment on machinery.

Test each sensor separately, then test combined failures. The first calibration may still drift. That is normal, but ignoring it is not.

Field trials should measure paving width, depth variation, fuel use, and operator interventions across different soil conditions. McKinsey’s construction productivity research found that industry productivity had grown only about 1% annually for two decades, so automation should target measurable waste, not merely add screens and wiring.

Test, Calibrate, and Maintain the Upgraded Ditch Paver

After converting a manual ditch paver to automatic control, test every function before entering a work area. Check the drive motor, hydraulic response, depth sensor, and steering feedback separately. Keep a notebook. Record speed, ditch depth, paving width, material flow, and weather conditions. A dry run can reveal wiring faults, but loaded testing shows the real behavior.

Calibrate the depth sensor on a level reference surface. Then compare its reading with a physical measurement inside the ditch. Repeat this check at shallow, medium, and deeper settings. Adjust travel speed until the paver maintains a steady layer. Test the automatic stop, boundary limits, and manual override. Never assume the first successful pass proves accuracy.

Maintenance must follow actual working conditions. Remove wet soil from sensors, linkages, and protective covers after each shift. Inspect cables for crushed insulation and check hydraulic fittings for slow leaks. Lubricate moving joints according to operating hours, not guesswork. I once trusted a clean sensor reading, but compacted soil had changed its angle slightly. That small error produced an uneven edge. The lesson was uncomfortable: calibration needs repetition, especially after transport, repairs, or severe vibration. Review the test notes weekly and change one setting at a time.

FAQS

: What should be upgraded before adding a motor?

: Upgrade the control system first. Use a rugged programmable controller with sealed connectors and clear diagnostics. It should read speed, position, and emergency-stop signals. Keep the wiring diagram inside the service panel.

Which sensors are useful for an automated ditch paver?

An encoder can measure conveyor or wheel speed. A linear sensor can track screed height. Proximity sensors can detect travel limits. A level sensor can monitor material near the hopper.

Why should sensor readings be checked manually?

Mud, moisture, dust, and loose cables can create false signals. Compare readings with a tape measure and slow-motion video. Do not trust one perfect reading. Conditions change during long work periods.

How should powered components be selected?

Measure required force, travel speed, and duty cycle. Then select a geared drive, hydraulic actuator, or electric cylinder. Include overload protection and accessible isolation points. One early test may mislead you.

How can the screed produce more even edges?

Use an adjustable actuator for screed height and paving width. Add a position sensor to monitor movement. Clean the sensor often. Wet soil can cover it quickly.

How can material flow remain steady?

Match conveyor speed with machine travel speed. This helps prevent empty sections, piles, and waste. Use a guarded chain or belt system. Provide inspection points that operators can reach safely.

How should the delivery gate or auger operate?

It should open gradually. A sudden release can overload one section. During testing, compare material depth every few meters. Small differences may reveal calibration problems early.

Is full automation reliable in changing ditch conditions?

Not always. Soil moisture, aggregate size, and ditch shape can confuse fixed settings. Keep manual override controls available during setup and testing. Leave room for operator judgment.

What checks should happen before regular operation?

Test emergency stops before daily work. Record motor temperature, current draw, and paving consistency across several passes. Check sensor readings again after cleaning. A qualified technician should verify the final controls.

What should operators do when early settings seem wrong?

Record the setting and the field result. Review uneven edges, material depth, and machine drift. Adjust carefully. Some settings will be wrong. That is useful information.

Conclusion

This guide explains how to upgrade a manual ditch paver to automatic by first evaluating its existing structure, operating method, paving capacity, and limitations. The process begins with clear automation goals, such as improving placement accuracy, reducing operator effort, and achieving more consistent material flow. Next, the machine should be fitted with a suitable control system, position and speed sensors, powered actuators, and other components required for safe and reliable operation.

The upgrade also involves modifying the paving, conveying, and material-delivery mechanisms so they can respond smoothly to automatic commands. After installation, all electrical, hydraulic, and mechanical systems must be integrated and carefully tested. Calibration should confirm paving width, travel speed, material volume, and control accuracy under different working conditions. Regular inspections, cleaning, software checks, and preventive maintenance will help preserve performance and extend the service life of the upgraded ditch paver.

Charlotte

Charlotte

Charlotte is a seasoned marketing professional with a deep understanding of the company's portfolio and a passion for elevating its presence in the market. With a keen eye for detail and a commitment to excellence, she ensures that our professional blog is regularly updated with insightful articles......