A slipform paver works under constant pressure. It feeds concrete, shapes the slab, controls elevation, and maintains alignment while moving across an uneven jobsite. Small maintenance failures can quickly become visible waves, weak joints, or costly production delays. This guide explains how to maintain a slipform paver machine through practical checks, cleaning routines, lubrication, and scheduled inspections.
Concrete residue hardens fast. Clean it before the next shift. Check the hopper, mold, sensors, tracks, and vibration components while surfaces remain accessible. Review the operator’s manual before adjusting hydraulic pressure or electronic controls. Manufacturer limits matter more than guesswork.
Tom Sturtevant, a veteran concrete-paving equipment trainer, offers a useful field principle: “A clean machine tells you what is failing before the gauge does.” The wording is simple. The lesson is not. Operators should listen for irregular vibration, watch oil leaks, and record unusual steering or grade-control behavior. Those details often reveal trouble early.
This top 10 guide focuses on habits that protect accuracy and uptime. It also acknowledges an uncomfortable truth: no checklist catches everything. Dust, heat, rushed cleaning, and inexperienced adjustments can defeat a good maintenance plan. Therefore, combine daily observations with qualified service inspections and manufacturer-approved parts. Keep maintenance records, photograph recurring damage, and question any repair that only treats the symptom. Reliable paving begins before concrete enters the hopper.
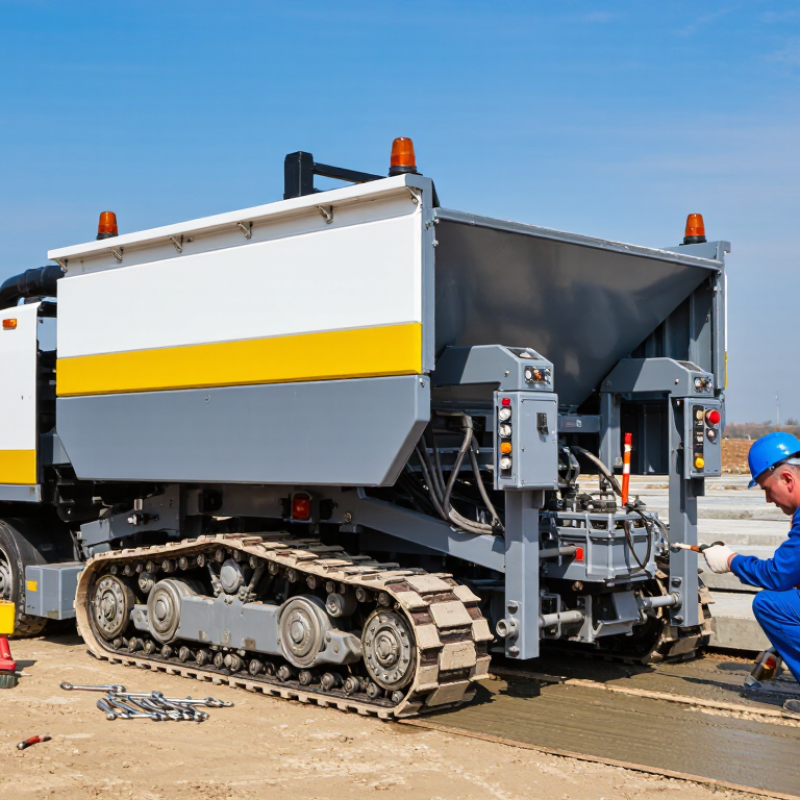
A slipform paver needs maintenance that follows engine hours, not guesswork. Check the OEM service schedule before every shift. Daily inspection should cover fluid levels, hydraulic hoses, screed alignment, augers, tracks, and vibration systems. Look for fresh oil beneath the machine. Small leaks rarely remain small.
Clean concrete buildup before it hardens around the mold, sensors, and finishing tools. Grease specified points with the correct lubricant, then inspect pins and bushings for movement. Test emergency controls and warning lights in a clear work area. Record operating hours, fluid additions, unusual noise, and surface defects. These notes help technicians find patterns, even when the machine seems normal.
At 250 hours, replace or inspect filters, belts, hydraulic connections, and drivetrain components according to the OEM interval. Check torque on critical fasteners, because vibration can loosen them gradually. Annual service needs deeper attention. Test hydraulic pressure, inspect electrical connectors, calibrate sensors, and examine structural welds for cracks. A clean checklist can still miss hidden wear. I once treated a slight steering delay as harmless; later, a worn linkage caused uneven paving. Leave time for a second inspection, and have qualified technicians verify findings before extended production.
| No. | Maintenance Focus | Recommended Interval | Inspection or Service Action | Acceptance Check / Corrective Action | Safety and Recordkeeping |
|---|---|---|---|---|---|
| 1 | Walk-around inspection | Daily / Before operation | Inspect the frame, tracks, screed, tamper bars, vibrators, guards, fasteners, and visible hydraulic lines for damage, looseness, or leaks. | Repair or replace damaged parts before paving. Do not operate with exposed moving parts or active hydraulic leaks. | Park on level ground, lower attachments, stop the engine, and record defects on the daily checklist. |
| 2 | Engine fluids and cooling system | Daily; 250-hour service | Check engine oil, coolant level, fuel, and visible hoses. Clean the radiator and charge-air cooler when dust or material buildup is present. | Use the specified fluid grades. Investigate falling fluid levels, overheating, foaming, or contaminated oil rather than simply topping up. | Check levels with the machine in the position specified by the service manual; avoid opening a hot cooling system. |
| 3 | Track assemblies and undercarriage | Daily; 250-hour service | Remove built-up concrete or asphalt. Check track tension, rollers, idlers, sprockets, pads, and final-drive housings. | Adjust tension only to the specified sag or measurement. Replace excessively worn, cracked, or damaged components. | Keep hands clear of tracks and use approved lifting and blocking equipment during undercarriage work. |
| 4 | Hydraulic system | Daily; 250-hour service | Inspect the reservoir level, filters, hoses, fittings, cylinders, pumps, and valves. Look for oil mist, abrasion, and damaged hose coverings. | Replace filters and hydraulic oil at the manual-specified interval or sooner if contamination, overheating, or abnormal pressure is detected. | Relieve hydraulic pressure before service. Never use hands to locate a high-pressure leak; use cardboard or a suitable detector. |
| 5 | Lubrication points | Daily; as specified by OEM | Grease pivot pins, steering or mold-adjustment points, conveyor pivots, screed linkages, and other listed fittings. | Apply clean grease until the joint is properly lubricated without forcing seals out. Wipe away excess grease that can attract abrasive dust. | Use the recommended grease type and a clean grease gun; do not mix incompatible products without confirmation. |
| 6 | Vibrators and tamper system | Daily; 250-hour service | Check vibrator mounts, eccentric housings, drive motors, electrical connections, tamper bars, and operating sound. | Investigate uneven vibration, unusual noise, overheating, loose mounts, or inconsistent frequency before the next paving shift. | Lock out the machine before reaching near the screed or vibrator assembly; keep all personnel outside the movement zone. |
| 7 | Screed, mold, and profile controls | Daily; annual calibration review | Clean contact surfaces and inspect mold plates, side forms, crown adjustment, sensors, and grade or steering components. | Confirm smooth adjustment and accurate response. Replace bent wear plates and recalibrate sensors when readings drift from the specified tolerance. | Use the machine’s approved calibration procedure and document reference measurements before and after adjustment. |
| 8 | Electrical system and controls | Daily; 250-hour service | Test alarms, emergency stops, work lights, joysticks, displays, connectors, batteries, and charging-system indicators. | Clean corroded terminals, secure loose wiring, and replace damaged connectors. Fault codes should be diagnosed before continued operation. | Disconnect power when required and follow battery safety procedures; never bypass an interlock or emergency stop. |
| 9 | Fasteners, welds, and structural frame | 250-hour service; annual inspection | Inspect high-load mounting points, tow or steering components, mold supports, welds, guardrails, and structural members. | Torque fasteners according to the specified sequence and value. Stop work for cracks, distorted members, or repeated fastener loosening. | Use a calibrated torque wrench and approved repair procedure; structural welding should be performed by qualified personnel. |
| 10 | Annual condition assessment | Every 12 months or OEM interval | Review service history, fluid analysis, wear measurements, engine performance, hydraulic pressure, track condition, safety devices, and calibration records. | Create a planned-repair list based on measured wear and operating hours. Replace safety-critical components before they exceed published limits. | Have major testing performed by trained technicians and retain inspection results, parts records, and updated hour-meter readings. |
Check fluid levels, hydraulic hoses, screed alignment, augers, tracks, and vibration systems. Look for fresh oil beneath the machine. Small leaks spread. Test warning lights and emergency controls in a clear area.
Hardened concrete can affect the mold, sensors, and finishing tools. Remove buildup before it becomes difficult to clean. Inspect pins and bushings afterward for movement.
Inspect or replace filters, belts, hydraulic connections, and drivetrain parts. Check critical fasteners for correct torque. Vibration can loosen them gradually.
Annual service should include hydraulic pressure testing, electrical connector inspections, sensor calibration, and structural weld checks. A clean checklist may still miss hidden wear. Use qualified technicians for verification.
Calibrate the grade system on a stable, known benchmark. Confirm the reference with a reliable surveying instrument. Keep the mast secure and the sensor near its normal working position.
Clean sensor lenses carefully. Check cables for cuts, moisture, and crushed sections. Inspect the mounting bracket for bending or looseness. Small details matter.
Calibration on an uneven surface can create accurate-looking data and poor concrete levels. I made that mistake during an early shift. Recheck after moving the mast or crossing rough ground.
Raise and lower the sensor slowly. The screed should respond smoothly, without sudden jumps or long delays. Check cross slope separately. Correct elevation cannot repair an incorrect transverse grade.
Record operating hours, fluid additions, unusual noises, surface defects, calibration values, and weather conditions. These notes reveal repeated patterns. Do not trust the display blindly.
A second inspection can find wear that looks harmless at first. I once ignored a slight steering delay. Later, worn linkage caused uneven paving. A few extra minutes can prevent larger defects.
Learning how to maintain a slipform paver machine starts with following a clear preventive maintenance schedule. Review the manufacturer’s service intervals and complete daily inspections, 250-hour checks, and annual servicing on time. Pay close attention to the hydraulic system by checking it at operating pressure, inspecting hoses and fittings, and confirming that all components remain clean and leak-free. Regularly calibrate sensors and grade-control equipment to help maintain elevation accuracy within ±3 mm and support consistent paving results.
The machine’s vibrators should also be monitored and adjusted so their operating frequency stays within the recommended range of 6,000–10,000 vibrations per minute. In addition, measure wear on the mold, auger, and tracks against the equipment’s specified replacement limits. Replacing worn parts before they affect alignment, material flow, or traction can improve productivity, reduce downtime, and help ensure a smooth, uniform concrete surface.

 MRECH Machinery