How to Solve Uneven Thickness During Ditch Lining?

Time:2026-09-20 Author:Liam
0%

Uneven lining thickness can quietly weaken a ditch long before visible cracking appears. Thin zones lose cover, resist abrasion poorly, and may leak under changing water pressure. Thick zones waste concrete and increase drying stress. The practical question is not only “how to solve uneven thickness during ditch lining construction,” but also how to prove the repair is uniform.

Industry guidance supports a measurement-based approach. The American Concrete Institute’s ACI 117 specification provides tolerance principles for concrete dimensions and thickness. The U.S. Bureau of Reclamation’s canal-lining reports also emphasize controlled grades, consistent placement, and inspection records. These documents point toward the same field routine: establish the subgrade profile, use fixed level markers, check form alignment, and measure fresh concrete depth before finishing. Small details matter. A loose string line can distort the reference. A poorly compacted base can create hidden voids.

Quality expert W. Edwards Deming offered a useful warning: “In God we trust; all others must bring data.” His words apply directly to lining work. Photographs help, but recorded readings are stronger evidence. Use a grid, test representative points, and compare actual thickness with the project specification. Correct thin areas immediately, rather than hiding them under surface mortar.

Still, no method is perfect. Weather, access, and rushed placement can defeat a good plan. The construction team must review failed measurements honestly and adjust its process. Uniform lining is achieved through repeated control, not confidence alone.
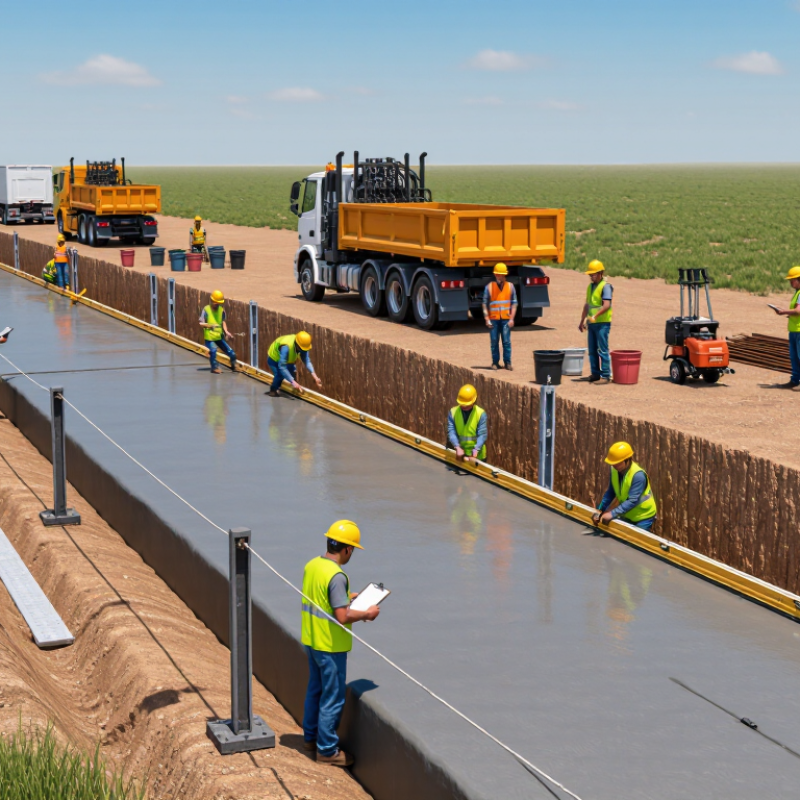
How to Solve Uneven Thickness During Ditch Lining?

Define the Causes of Uneven Thickness in Ditch Lining

Uneven thickness in ditch lining usually begins before concrete placement. Field inspections often reveal inconsistent subgrade trimming, not defective concrete. High spots receive a thin cover, while soft depressions create excessive thickness. Survey records should identify these changes before formwork starts. A 25-metre inspection grid can expose visible level differences quickly.

Water control is another major cause. Wet subgrade can soften soil and contaminate fresh concrete. Dry subgrade may absorb mixing water too quickly. Both conditions disturb placement and curing.

The U.S. Bureau of Reclamation Concrete Manual recommends continuous curing, commonly for at least seven days, to limit early moisture loss and cracking. Poorly adjusted screeds also create ridges. Workers may correct them by adding water, which changes the surface quality.

Construction tolerances must be checked, not assumed. ACI 117 provides dimensional tolerance benchmarks for concrete work, including thickness variation limits. Project specifications should define tighter limits when hydraulic performance matters.

Measure thickness using pins, depth checks, or core sampling at representative locations. Record chainage, weather, batch time, and surface condition.

One uncomfortable truth remains: a smooth surface can hide uneven thickness. The drawing may be accurate, yet the process may still fail.

More frequent checks may slow production, but repairing a thin, cracked section costs more. Mistakes happen. Unrecorded mistakes become defects.

Inspect Site Conditions and Measure Lining Thickness

How to Solve Uneven Thickness During Ditch Lining?

Uneven ditch lining often begins beneath the surface. Inspect the subgrade before placing concrete or another lining material. Look for loose soil, soft pockets, standing water, roots, and construction debris. Check the ditch slope with a level or survey equipment. Poor drainage can also wash fine soil away during installation. I have seen clean-looking surfaces hide weak support below. That mistake is easy to miss.

Measure the prepared base at regular grid points. Record elevations along the centerline, side slopes, corners, and outlet transitions. After installation, check lining thickness at the same locations. Use depth probes for fresh material when appropriate. For hardened concrete, use approved scanning methods or carefully selected cores. Compare every reading with the project drawings and specified tolerances. Do not rely on one measurement. A single thick area may conceal several thin sections. Uneven formwork and material settlement deserve another inspection.

Tips: Mark measurement points with paint before work starts. Photograph soft spots and water movement. Keep a simple inspection log with location, date, weather, and thickness. If readings vary sharply, pause the next work stage and investigate the base. Rechecking after correction may feel repetitive. It prevents expensive repairs later. Also question your own method; inconsistent probe pressure can create false results.

Prepare the Ditch Base and Set Accurate Thickness Guides

Uneven ditch lining often begins with an uneven base. Before placing concrete, remove loose soil, roots, and soft pockets from the ditch. Compact the exposed surface in thin layers until it feels firm underfoot and shows no visible movement. Check the longitudinal grade with a laser level, then inspect crossfall with a straightedge. Small high spots can steal several millimeters of lining thickness.

Prepare clear thickness guides along both ditch edges. Set them from fixed elevation points, not from the existing ground, because the ground may already be inaccurate. Use stable stakes or rails that will not shift during placement. Measure the required lining depth at regular intervals, including bends and transitions. A practical check is to place short depth pins across the base. They make thin areas easier to find before the concrete hardens.

During placement, keep the concrete moving evenly between the guides. Do not let workers build thickness by eye. It is fast, but unreliable. Recheck the guide level after heavy equipment passes nearby. I have seen a well-prepared base fail because one rail moved slightly during pouring. That mistake was preventable. Still, site conditions change, and perfect control is unrealistic. If the base becomes wet or ruts appear, stop and repair them rather than hiding the problem under extra material. Accurate guides cannot correct a weak foundation.

How to Solve Uneven Thickness During Ditch Lining?

Prepare the ditch base and set accurate thickness guides to keep the lining close to the 100 mm design thickness.

The representative six-section field dataset shows that an uneven or poorly prepared base can produce thicknesses from 82 to 118 mm. After compacting and leveling the base and installing fixed thickness guides, the measured lining thickness remains between 98 and 102 mm, close to the 100 mm design value.

Apply and Compact the Lining Material Evenly

How to Solve Uneven Thickness During Ditch Lining?

Apply and Compact the Lining Material Evenly

Uneven ditch lining often begins with inconsistent material placement. Before work starts, inspect the ditch width, depth, soil firmness, and surface moisture. Remove loose soil, stones, and standing water. A clean base supports better bonding and reduces weak spots.

Apply the lining material in controlled lifts, rather than placing one thick layer. Use a straightedge or depth gauge to check thickness along the ditch. Keep the material slightly moist, but never wet enough to slump. I once underestimated moisture near an outlet, and the compacted section became visibly thinner. That mistake showed why conditions must be checked continuously. Compact each lift with steady, overlapping passes. Pay special attention to edges, corners, and transitions, where tools often miss material. Avoid excessive pressure in soft areas. It may push material away instead of improving density.

Tips: Mark the target thickness on a measuring rod. Check every few meters. Compact from stable areas toward the center. Recheck the surface after each pass. If a hollow appears, fill it before continuing. Do not hide it under the next layer. Keep tools clean, because dried material can create ridges and false thickness readings. Record moisture, lift depth, and compaction passes. These notes help identify patterns when results are inconsistent. Small corrections are easier than major repairs later.

Check Thickness Uniformity and Correct Defective Areas

Uneven thickness in concrete ditch lining often starts with a simple inspection gap. Check the finished surface before accepting the work. Mark a grid along the ditch, then record thickness at regular intervals, joints, transitions, and visible depressions. A laser level can reveal profile changes, but direct measurements remain essential. For hardened concrete, ASTM C42 provides recognized procedures for core sampling and measurement.

Use the project specification and ACI 117-10 as control references. ACI 117-10 commonly permits a negative thickness tolerance of about 10 mm for concrete dimensions up to 300 mm. This is not permission to ignore thin areas. Water pressure, soil movement, and freeze-thaw cycles can expose weak zones quickly. Compare measured results with the design thickness, not only with the average value. One thick section cannot compensate for one dangerous low spot.

Repair decisions should match the defect. Remove loose concrete, clean the surface, and prepare the substrate before applying a compatible repair material. Deep voids may require partial removal and recasting. Shallow defects may accept a bonded overlay, if the engineer approves it. Keep repair edges straight. Feathered edges often fail early. Record each location, measured depth, repair method, and curing condition. Inspection records are useful evidence, but they are not perfect. Missed readings still happen. A second inspection after curing can reveal cracking, debonding, or settlement that the first check missed.

FAQS

What commonly causes uneven thickness in ditch lining?

Uneven subgrade levels are a common cause. High spots create thin cover, while soft depressions create excessive thickness.

How should the ditch base be prepared before concrete placement?

Remove loose soil, roots, and soft pockets. Compact the exposed soil in thin layers until it feels firm and shows no movement.

How can crews identify level differences before formwork begins?

Use a 25-metre inspection grid and check visible changes. Confirm the longitudinal grade with a laser level.

Why are thickness guides important?

Guides control the required lining depth. Set them from fixed elevation points, not from possibly inaccurate ground levels.

How can workers find thin areas during placement?

Place short depth pins across the base. Check them regularly, especially near bends, transitions, and changing ground conditions.

What effect can wet or dry subgrade have on fresh concrete?

Wet soil may soften and contaminate fresh concrete. Dry soil can absorb mixing water too quickly, affecting placement and curing.

How long should curing commonly continue?

Continuous curing commonly lasts at least seven days. It helps limit early moisture loss and reduces cracking risk.

How should lining thickness be verified after placement?

Use depth checks, pins, or representative core samples. Record chainage, weather, batch time, and surface condition.

Can a smooth surface still contain defects?

Yes. A smooth finish can hide uneven thickness beneath the surface. A good drawing is not enough.

What should crews do if guides move or ruts appear?

Stop placement and repair the base or guides. Do not hide weak areas under extra concrete. Mistakes happen.

Conclusion

Uneven lining thickness in a ditch can result from an irregular base, inaccurate measurements, inconsistent material placement, poor compaction, or changing site conditions. To understand how to solve uneven thickness during ditch lining construction, begin with a careful site inspection. Measure the ditch profile and check the lining thickness at multiple points, especially near curves, joints, and changes in elevation. Remove loose soil, standing water, and debris, then shape and compact the ditch base so it provides a stable, consistent foundation. Clearly marked thickness guides can help workers maintain the required depth throughout the project.

The lining material should be placed in controlled quantities and distributed evenly from one section to the next. Proper compaction is essential because excessive pressure in one area may create thin spots elsewhere. After installation, inspect the finished surface and take additional thickness measurements to identify variations. Any defective areas should be repaired promptly by removing unstable material, adding the correct amount of lining material, and compacting it to match the surrounding sections. A final uniformity check helps confirm that the completed ditch lining is consistent, durable, and properly supported.

Liam

Liam

Liam is a dedicated marketing professional with a profound expertise in the industry, where he excels at highlighting the unique advantages of our core products. With a keen understanding of market trends and consumer needs, Liam frequently updates our company’s professional blog, providing......